About Tile Extruder
The Problem
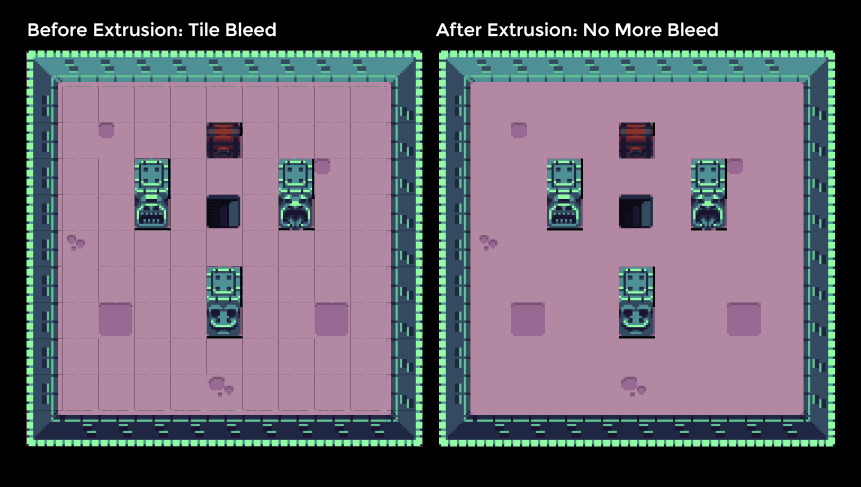
When rendering tiles in game engines, you may encounter “bleeding” issues where tiles are rendered with the wrong color at the edges:
You can read more about the bleeding problem and solution here. The TL DR is that there are many ways this type of rendering artifact can occur, e.g. from pixels being incorrectly blended when the edge of a tile in a tilemap texture is rendered.
The Solution
Tile Extruder solves this problem by extruding the edges of each tile outward, creating a buffer zone that prevents color bleeding.

You can extrude a tileset using this web app, or via the sister command line tool (CLI). For more info on the CLI, see the GitHub repository.
Using an Extruded Tileset
This tool was built for a Phaser & Tiled project, so here's how to integrate with that pipeline.
If you've already built a map in Tiled with a non-extruded tileset and are looking to replace it with an extruded tileset, you've got a couple options:
- Extrude the tileset and then update your existing tileset in Tiled. In the “Tilesets” panel, click on the edit tileset icon (the wrench) and then click on “Tileset Properties” under the Tileset menu bar item. Edit the “Image” field, replacing the tileset image with the new extruded image and updating to the margin and spacing.
- If you'd rather leave your Tiled file alone, you can just adjust things on the Phaser side. See this example. You want to load the extruded tileset image, and then when you create your tileset, specify the appropriate margin and spacing:
const tileset = map.addTilesetImage("tileset", "tileset-extruded", 48, 48, 1, 2);
Note: You'll have to adjust your margin & spacing because of the extrusion. If you had no margin & spacing, then a tileset that has been extruded by 1px will have a margin of 1px and a spacing of 2px.